Hello friends! As many of you know, I'm always in the kitchen trying new recipes and figuring out how to make things work best for me. I've collected a few hacks and tips to share, and please let me know if you'd like to see more posts like this in the comments.
- Premade Crescent Rolls - These are a fridge staple at my house, and they're good for more than you may think. Some of our favorite uses are:
- Crescent Rings: You can look up Pillsbury's Taco Ring to get the specifics on how to make it, but we like to switch up the fillings, too. The taco version is great, and other popular variations include breakfast (scrambled eggs, crumbled turkey sausage, shredded cheese, green onion, etc.) and chicken pot pie (shredded chicken, cream of chicken soup, peas, carrots, etc.). We also like to use the reduced-fat crescents, just to make it a smidgen better for us.
- Nutella Croissants: These are ridiculously easy. Before you roll up the crescents as you normally would, spread Nutella all over the side that will be the inside, leaving the end (about 1/2 in.) plain so it sticks to itself. Bake as directed, and end up with either a decadent weekend breakfast or an impressive dessert that took you no time to make.
- Breakfast Pigs in Blankets: Similar to the Nutella croissants, just roll (or fold)your fillings into the crescents and bake. Some of our favorites are sausage links with cheese, turkey and pesto, and turkey pepperoni, mozzarella, and tomato sauce. These also make great snacks or appetizers.
- Leftover Barley Soup - This is the easiest soup I've ever made, and one of the tastiest ways to get rid of leftovers. Any time we have something like pot roast and veggies, Swiss steak, or roasted chicken or turkey, I make sure I pack up the leftovers. To make the soup, chop up the meat and any veggies, and throw them in a large pot with any gravy you may have. Add another 6-8 cups of liquid (either chicken stock, beef stock, or water) and 2 bay leaves, and bring to a boil. Add 2/3 cup of barley and simmer for 30 minutes, adding frozen veggies at the end if you like. Take out the bay leaves and enjoy!
- Easy Frosting - Personally, I hate it when traditional buttercream begins to harden and almost crust over as it sets. To solve that, I always make my frosting with 2 sticks of butter, 1 stick of shortening, a splash of vanilla, and 3 cups of powdered sugar. This frosting also takes really well to other flavors, so feel free to add coffee, reduced wine, salted caramel, any kind of nut or cookie butter, or just plain melted chocolate. All the flavor without the crust.
- Drying Herbs - Whether I'm picking herbs from my garden or buying a pack of herbs from the store, I always have more than I can use before they go bad. I like to dry anything that I don't want to waste by tying them in bundles with rubber bands or twine (inside paper bags for tiny herbs like thyme so the leave don't fall everywhere), and tie them to a coat hanger. I let them hang out until they're dry, them take the dried leaves off the stems for storing.
- Leftover Frittata - Another great way to get rid of leftovers is by making a frittata. At my house, we call this "Friday Dump Frittata," because we take a bunch of leftovers and dump them in a pan, then make a frittata out of them. To make a basic frittata, put your ingredients, seasonings, and 6 scrambled eggs in an oven-safe skillet and bake for 20-25 minutes at 350 degrees Fahrenheit until the eggs are set. Some of our favorites are:
- Buffalo Chicken: Shredded chicken, hot sauce, diced potatoes seasoned with ranch powdered dressing mix, green onion, and topped with cheese.
- Taco: Taco meat of any variety, green onion, bell peppers, diced potatoes, shredded cheese, and topped with your favorite taco toppings.
- Classic Breakfast: Crumbled sausage or bacon, peppers and onions, potatoes, cheese, topped with hot sauce.
I wish you all the best,
Erin
Hello friends! Recently I was watching Food Network and they were showing how to make Swiss meringue buttercream. My mom asked me to make it to see what all the fuss is about, so I went on the hunt for the perfect recipe as well as the perfect cupcake to pair with it. I ended up adapting a simple vanilla cake recipe and taking general ideas from many buttercream recipes. Here's what I came up with:
The Lineup (Cupcakes):
2 1/4 cups AP flour
2 1/2 tsp baking powder
1/4 tsp salt
1 box instant pistachio pudding mix
8 tbsp. butter, softened
1 3/4 cups sugar
2 eggs, room temperature
Splash vanilla
1 1/4 cups unsweetened almond milk, room temperature
(Buttercream)
4 oz. (1/2 cup) egg whites
1 cup sugar
16 tbsp. butter, cubed and softened
Seeds from 1 whole vanilla bean
The Play-by-Play:
- Preheat the oven to 350 degrees Fahrenheit and line 2 cupcake pans.
- Mix flour, baking powder, salt, and dry pudding mix in a small bowl and set aside. Add a splash of vanilla to almond milk and set aside.
- Cream together butter and sugar in a large bowl until fluffy, about 3 minutes. Add eggs 1 at a time, mixing in between.
- Alternate adding flour mixture and milk mixture, beginning and ending with flour. Mix until just combined and smooth.
- Evenly distribute batter between 24 cavities, filling about 2/3 full. Bake 16-18 minutes until springy to the touch. Cool completely.
- Over a double boiler, combine egg whites and sugar until all granules dissolve and whites reach 160 degrees Fahrenheit on a candy thermometer. Place bowl in an ice bath to bring down to room temperature.
- Pour egg mixture into the bowl of a stand mixer fitted with a balloon whisk and beat on medium high for about 10 minutes until soft peaks form. Add vanilla beans.
- Quickly add butter piece by piece while mixer is still going, mixing until combined and before buttercream starts to break down.
- Pipe buttercream onto cooled cupcakes. Enjoy!

I wish you all the best,
Erin
Hello friends! Today I'm sharing my favorite cookie dough recipe with a twist. Instead of traditional chocolate chip cookies (which are just as delicious), I'm using this basic brown sugar dough to make chocolate toffee nut cookies, and oh my goodness, they are good. As a bonus, this particular recipe stays very fluffy and doesn't spread all that much, and also holds lots of mix-ins very well. Bake on!
The Lineup:
2 1/2 cups AP flour
1 tsp baking soda
1/2 tsp salt
1 cup (2 sticks) butter, softened
1 cup packed brown sugar
1/2 cup granulated sugar
2 eggs
1 tbsp vanilla
1/2 cup chopped chocolate (I used dark, but you could use anything you like)
1/2 cup chopped pecans
1/2 cup toffee pieces (mine did not have chocolate on them, but those would work,
too)
The Play-by-Play:
1. Preheat the oven to 375 degrees Fahrenheit. Mix flour, baking soda, and salt in a
medium-sized bowl, set aside.
2. Beat butter and sugars with an electric mixer until light and fluffy. Beat in eggs and
vanilla.
3. Add flour mixture to butter mixture in thirds, mixing until combined. Add in
chocolate, pecans, and toffee pieces, mix until combined.
4. Drop rounded tablespoons of dough (I used an ice cream scoop to ensure
consistent sizes) on cookie sheets lined with parchment or silicone mats. Bake 8-10
minutes until golden.
5. Let cool on cookie sheets 2 minutes, then transfer to cooling racks. *PLEASE resist
the urge to eat them straight out of the oven, as the toffee pieces will be melted
and still very hot.
6. Place cooled cookies into a zipper bag to keep fresh up to 1 week. Enjoy!
I wish you all the best,
Erin
Hello friends! I have another scone recipe for you all, but this one is much different from my other scone recipe. These are extra decadent and yummy, and the huge batch size lets you enjoy them much longer.
The Lineup (Scones):
4 cups AP flour
4 tbsp sugar
2 tbsp baking powder
1/2 tsp salt
12 tbsp salted butter, cold and cubed
1 large (5.6 oz) box instant vanilla pudding mix
2 tbsp vanilla
2 eggs
1 1/4 cups heavy whipping cream
(Glaze)
4 tbsp salted butter, softened
1 tbsp vanilla
1/2-1 cup heavy whipping cream (depending on desired glaze consistency - 1/2 cup
will be more like frosting, 1 cup will be a thick but fluid glaze, which is what I did)
2 cups confectioners sugar
The Play-by-Play:
- Preheat the oven to 425 degrees Fahrenheit and line baking sheets with either parchment paper or silicon mats.
- Whisk flour, sugar, baking powder, and salt in large bowl. Drop in cold butter cubes and quickly squish into flour. This will create flakes of butter but must be done fairly quickly to avoid melting (alternate methods below).
- Mix in pudding mix, then add vanilla, eggs, and cream. Work together with a spoon, then use hands to combine. Dough is done when no longer tacky to the touch.
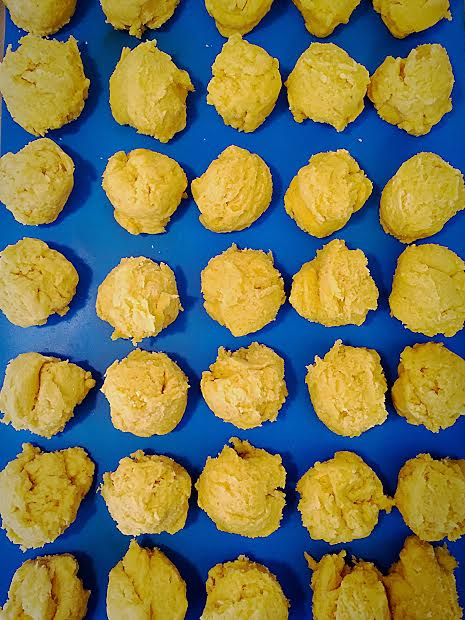
- Using an ice cream scoop, place 1 tbsp balls of dough onto sheets. Flatten slightly, as dough doesn't spread too much.
- Bake for 8-10 minutes and leave to cool.
- To make the glaze: Whip butter, then beat in cream and vanilla, starting only with 1/2 cup cream (more can be added after sugar). Beat in sugar until combined, then check consistency. For more runny glaze, add more cream).
- Spread or pour the glaze onto the scones, and eat them as quickly as possible. If you make them last more than a few hours, they keep uncovered for two days or covered for a week.

Quick Play:
This recipe made 45 scones, and I certainly did not need that many at one time. I made the dough as directed, then scooped the balls onto a lined baking sheet and stuck them in the freezer. I saved ten to bake and glaze, and then put the glaze into individual(ish) cups and froze them, too. I then divided the frozen dough into bags (about a dozen per bag), labeled them with baking directions, and put everything in a big bag to freeze until I want these heavenly scones again. To bake them, I thaw the dough to room temperature, flatten it, and bake as directed. The glaze will also thaw, and it goes on top of the tasty little scones as quickly as I can do it. I waste no time in eating these guys.
*I mentioned about that there are a few other ways to cut butter into flour, the most popular being a pastry cutter (or forks if you don't have that), and then by pulsing them together in a food processor. Frankly, I'm too impatient for a pastry cutter and too lazy to wash a food processor bowl and blade, so quick hands are definitely my preferred method, but do whatever you'd like.
The Playmaker:
Adapted from http://www.crazyforcrust.com/2013/05/starbucks-petite-vanilla-scone-copycat/
I wish you all the best,
Erin
Hello friends! It's been a long time since I've done a favorites post, simply because I don't accumulate enough stuff to love within a month. I do love a good favorites post, though, so from here on out I'll be doing seasonal favorites. I'll be keeping track of my loves throughout the season, and write up a post when the season ends, and certainly without specific categories and limits like I had before. So here we go, Stuff I Love Summer 2016.
- Baking - If you've seen anything consistent on this mess of a blog, it's baking posts. Baking is what I absolutely love to do; I love making people happy and bringing them together over something simply and tasty. My dream is to open a bakery exactly for those reasons, so I'm getting all the practice in that I can before that time comes.

- Food Network - I'll be the first to call myself out and say I'm more like a 50's housewife than a young millennial. Because I love everything food, Food Network is like my kryptonite. I can't ever get enough; I have it on in the background all the time, I try the recipes, I cook like I'm talking to a camera... It's just the perfect thing for a foodie like me.
- Dunkin Donuts App - I may have mentioned coffee on here once or twice (or a billion times), and, plain and simple, this app feeds the addict in my like no other. It's a way to pay digitally, so that's good, but I also get points every time I go in and those points get me free drinks. I also always have other perks and rewards waiting for me, so really everybody wins.
- Iced Coffee - Hey look, more coffee! I went from being a no-coffee-ever girl to a two-to-three-cup-a-day girl in a matter of weeks, so this should be no surprise.

- Textured Ponytails - Midwest summers are the creation of Lucifer himself. From mid-May to mid-October, it's hot and sticky and buggy and just gross, and there are only so many socially acceptable ways to keep cool while looking nice. Enter textured ponytails to solve all my problems: I put my hair in French braids after I shower at night, and then wake up with insane texture. I do a little poof at the top of my head, pull the rest back, and then tease for volume and spray with sea salt spray to keep that texture. I finish by pulling out some pieces to frame my face, and then I'm good to go. The humidity will never again claim my straight hair as its victim.
- Harry Potter Weekend - Freeform (formerly ABC Family) does Harry Potter Weekend about four times a year, and I live for it. That said, I'm the biggest baby and can't watch anything after Goblet of Fire because they all give me nightmares, but gosh darn it, I try every time to make it through. It's a life goal. Sad? Nah.
- Wedges - I'll be starting a Story Time series sharing my embarrassing stories and "Why me?" moments shortly after this goes up, but I'll give a sneak peek here: I'm so ungraceful it pains me. Which means walking in heels is actually a huge hurtle for me. Can't do it. However, wedges are a different story. I love wedges, and summer is definitely wedge season. Added bonus: I'm fairly tall, so wedges make me feel like a giant ready to conquer anything. It doesn't get better than that.
- Hairspray - No, not the hair product, but the musical. Specifically the 2007 movie version. It's been my summer soundtrack and the thing I watch when I've run out of videos on YouTube and don't want to restart Friends for the zillionth time on Netflix.
- Summer Dresses - I've never been a dress wearer. Never. Well, maybe before I started dressing myself, but that doesn't count. I've been missing out! I wear them to work all the time, and it's the best thing because dressing for work is the most stressful kind of dressing. I throw it on and I instantly look 1000x more presentable than I did before.

- Colorado - If you ask anyone I've spoken to in the last few weeks, they will tell you that my favorite thing is Colorado because I just won't shut up about it. I miss is every day, and I've already started scouting out the best place to move there when I'm done with school. If I could go back now, I absolutely would.

- Name Videos - I have a slight obsession with names. Maybe a bit more than "slight." Like, I have lists and sibling sets and follow Instagram name accounts, but my favorites are YouTube name vloggers. It's just so interesting learning about names and hoping for the future, hearing other people's choices and learning their tastes. I'm hooked.
- Everything Bagels - Confession time: Until about six months ago, I was convinced that everything bagels are called everything bagels because they're good for everything, toasting, sandwiches, etc. It was only when I said that that my mom looked at me and said, "Are you serious? It's because they put everything on them, like the seeds and the onion and everything." Regardless, I still think they're good for everything, hence I eat them all the time.
Let me know if you have any suggestions on posts you'd like to see in the future, and also be sure to find me on Instagram as streamers.of.consciousness
I wish you all the best,
Erin
Hello friends! I have another dessert recipe to share with you, that being red velvet cookies. This is a recipe I kind of threw together myself after looking at so many others in an attempt to find one I liked, and this is what I came up with.
The Lineup:
1 1/2 cups flour
2 1/2 tbsp. cocoa powder
1 tsp. baking powder
1/4 tsp. salt
1/2 cup butter, softened
2/3 cup brown sugar
1/4 cup sugar
1 egg
2 tbsp. Greek yogurt
1 1/2 tsp. vanilla
1 1/2 tsp. red food color gel
2/3 cup white chocolate chips (optional)
The Play-by-Play:
1. Mix flour, cocoa, baking powder, and salt together in a small bowl, set aside.
2. Cream together butter and sugars. In a small bowl or ramekin, mix together yogurt,
vanilla, and food color gel, add to butter and sugar. Add egg, mix well.
3. Slowly add flour mix to butter mix in 2 stages, mix until combined. Mix in 1/3 cup
white chocolate chips.
4. Refrigerate dough at least 30 minutes before rolling into balls. Place remaining
chocolate chips on top before baking. Depending on size, bake approximately 10
minutes at 350 degrees.5. Let cool on pans about 2 minutes before transferring to cooling racks. Enjoy!
Alternates & Quick Play:
- Try using things other than white chocolate - dark or milk chocolate, walnuts, etc.
- I used about 1/2 tbsp. of dough per cookie, but more dough will require more cooking time.
- You can also place the remaining chocolate chips on top of the cookies as soon as they come out of the oven to avoiding the browning on top.
I wish you all the best,
Erin
Hello friends! I've been super into my baking lately, and I've really gotten the chance to figure out the essentials I need to make amazingly impressive desserts and treats. I keep everything I have separated into four categories and stored in four clear bins for easy access and storage, so I'll go box by box and tell you what's in my essential baking toolbox.
The Tools Toolbox - This is the box where I keep the mechanical stuff that I really only use for baking. My top picks are:
- Silicone baking mats: These are great for baking cookies and scones; usually I like cookie sheets with parchment, but I hate cutting it down or risking it burning over the multiple uses it takes to make a full batch of anything. These are the perfect solution to that.
- Disposable piping bags: I absolutely love the look of piped icing, but I hate cleaning piping bags with a passion. These let me get everything done, then just cut the tip out and toss the mess.
- Piping tips: For me, only two piping tips are absolutely essential: a round and a star, preferable larger and open. They give the looks of classic cupcakes and elegant, swirly cupcakes.
- Palette knife: The essential tool for cake frosting. I like to have two; a large straight one for the sides and a bent one for the top.
- Ice cream scoop: These are essential for equal portions in baking. I like the ones with the squeezable handle that shuffles the dough or batter out, and I use them for everything from cookies to cupcakes to scones.
- Cake leveler: This tool looks like a saw and is used similarly to even out risen cake tops. As long as its feet stay on the table or countertop, your cakes will be perfectly level every time.
- Electric hand mixer: This is the most essential tool of the bunch - most everything starts with a creamed butter base of some sort, and this makes it so much easier than trying to do that by hand.
The Edibles Toolbox - This box has all the edible things I don't keep in the pantry: sprinkles, food coloring, extra vanilla, etc. My top picks are:
- Food color paste: Food color paste is much more concentrated than the liquid stuff, so it ensures your baked goods turn out the color you intend (goodbye, pink watermelon cake!).
- Sprinkles: I like to keep a variety of sprinkles on hand. Good for cakes, yes, but even better for cookies - Dip any raw cookie dough (sugar is always my pick for this) into sprinkles, bake as per normal, and end up with schnazzy cookies that were no extra work at all.
- Candy melts: I always have a bag of candy melts on hand (usually just the basic white because I have a box of candy-specific coloring). You never know when you'll need to make a white chocolate ganache or whip up some Oreo truffles for a party.
The Cupcakes Toolbox - I'm going to be very honest, this box is 99% guilty pleasure buys. The entire box is full of any cupcake liner I will ever need, which I will probably never use up in my lifetime. But I'll give you my top picks to be ready for any occasion:
- Basic colors: If nothing else, you need white liners, but I also really love the basic colors for their versatility.
- Patterns: Also very versatile, I love patterns for more plain-looking cupcakes.
- Holiday/theme-specific: These are the smallest group I have, but it's nice to have liner with balloons for birthdays, ornaments for Christmas, etc.
The Presentation Toolbox - This is the box where I keep all the little bags, boxes, and toppers to make my treats extra cute, especially if I'm gifting them. Here are my top picks:
- Individual cupcake boxes: I love making giant cupcakes for people's birthdays, and these are perfect for giving them away.
- Twist tie bags: These have the same basic principal as the cupcake liners - one basic is necessary, multiple decorative are nice to have. I like to have different sizes and I try to keep the seasons neutral because I don't use these as often.
- Large treat boxes: I have a few Christmas-themed larger boxes perfect for giving cookies to people. This is only necessary of you're a bake-aholic like me during the holidays.
I wish you all the best,
Erin
Hello friends! I recently was asked to cater a small bridal shower, so here's how I did everything from the menu and prep timeline to setting up my food stations, as easily as possible.
Menu: Bruschetta Bar, Pasta Primavera, Cannoli Dip with Pizzelle Chips, Sangria Cupcakes & Chocolate Salted Caramel Cupcakes
Recipes:
Bruschetta Bar
Crostinis: Slice French bread on the bias, brush with olive oil. Toast at 350 degrees for
5 minutes.
Bruschetta: Dice 3-5 tomatoes, removing seed pockets to avoid too much moisture. Add
1 clove crushed garlic, 1/4 chopped basil, 2 tbsp. olive oil, 1 tbsp. red wine
vinegar, and salt and pepper.
Whipped Ricotta: Whip 15 oz. part-skim ricotta with 1 tsp. salt.
Pesto: store-bought
Olive Tapenade: store-bought
Balsamic Berries: Reduce 1/2 cup balsamic vinegar over medium heat 8-10 minutes.
Combine with approx. 2 cups (total) blueberries, raspberries, and chopped
strawberries, and about 6 chopped mint leaves.
Honey & Walnuts: That's it. Easiest topping ever.
Pasta Primavera
1 red bell pepper, chopped
1 green zucchini, chopped
1 yellow zucchini, chopped
1 bunch asparagus, chopped
1/2 bunch broccoli, chopped
1 container mushrooms, chopped
1 bag spinach
1 container cherry tomatoes
Olive oil
Salt & pepper
Cayenne pepper
2 boxes pasta
Grated Parmesan
Juice of 1 lemon
1. Chop all vegetables (except spinach) to the same size. Drizzle with olive
oil, season with salt and pepper. Roast peppers, zucchini, and broccoli for 12 minutes,
tomatoes for 7 minutes, and asparagus and mushrooms for 5 minutes, all at 425
degrees.
2. Heat approx. 1 tbsp. oil in a skillet. Add spinach, salt, pepper, and cayenne pepper.
Toss until spinach is wilted, remove from heat.
3. Cook pasta according to directions, drain. Mix in all vegetables, lemon juice, Parmesan,
salt and pepper to taste.
Cannoli Dip
15 oz. ricotta
8 oz. mascarpone
Splash vanilla
1 1/2 cups confectioners' sugar
Dash cinnamon
1 cup mini chocolate chips
Pizzelle cookies for dipping
1. Whip ricotta and mascarpone until smooth, add vanilla. Mix in confectioners' sugar 3/4
cup at a time, add cinnamon. Fold in chocolate chips. Serve with pizzelles.
Sangria Cupcakes
1 box angel food cake mix
Zest of 1/2 orange
1/2 cup blueberries
1/2 cup strawberries, chopped
2 cups red wine
1/4 cup sugar
1 cup shortening
1 cup butter
Splash vanilla
4 cups confectioners' sugar
Blueberries, strawberry & orange slices for topping
1. Prepare cake mix as directed, folding in zest and berries before scooping batter into
lined cupcake tins. Bake as directed, let cool.
2. Combine wine and sugar into small saucepan, bring to a boil on medium-high heat.
Reduce to medium-low heat 20-30 minutes, take off heat, let cool.
3. Whip shortening and butter together. Add vanilla and 1/2 cup wine reduction,
combine. Add confectioners' sugar 1 cup at a time, whipping until combined. Add pink
and purple food coloring, if desired.
4. Pipe frosting onto cupcakes, top with reserved fruit.
Chocolate Salted Caramel Cupcakes
1 box chocolate cake mix
1 box chocolate pudding mix
1 cup shortening
1 cup butter
Splash vanilla
1/2 cup caramel sauce
4 cups confectioners' sugar
Sea salt
1. Prepare cake mix as directed, adding pudding mix to cake mix before combining. Scoop
into prepared cupcake tins. Bake as directed, let cool.
2. Whip shortening and butter together. Add vanilla and caramel, combine. Add
confectioners' sugar 1 cup at a time, whipping until combined.
3. Pipe frosting onto cupcakes, sprinkle with sea salt.
Timeline: The shower was on a Saturday evening, so I prepped and made as much as I could on Friday. Friday morning, I started with the sangria cupcakes. While those were cooling, I chopped made the bruschetta, leaving out the basil until serving the next day. When the cupcakes were cool, I made the chocolate cupcakes with the same tins. With those in the oven, I chopped most of the primavera vegetables and put them into a bag and kept them in the fridge. Then I made the cannoli dip. After that, I made the balsamic berries, leaving out the mint until serving the next day. Then I made the red wine frosting, piped it onto the cupcakes, and left the fruit topping for the next day. Finally, I made the caramel frosting, topped the chocolate cupcakes, and sprinkled on the sea salt.
On the day of the shower, I made the pasta and kept it warm in foil pans placed in a towel-lined cooler. I also did finishing touches, like topping the sangria cupcakes and adding the herbs. I also didn't make the crostinis until the shower was about to start.
Setup: The shower was in a house, so I utilized the space I had to make food stations. On the kitchen table, I put down brown butcher paper and laid out my bruschetta bar. On the counter, I put the cupcakes and cannoli dip, and put the pasta on the stove. There was also and Italian wine tasting (which I was not in charge of) in the dining room. This all allowed people to grab what they wanted easily and kept it so that no one area was too congested.
That's it! I've never catered a whole event before, and this was really catering made easy. Everything was successful - Italian food done like this always impresses, and it's way easier than it looks.
I adapted the sangria cupcakes and cannoli dip from these blogs:
http://thefirstyearblog.com/sangria-cupcakes/
http://www.ifyougiveablondeakitchen.com/2016/02/06/easy-cannoli-dip/
The rest of the recipes are mine, so please credit Streamers of Consciousness if you use them elsewhere.
I wish you all the best,
Erin
Hello friends! I've been super into baking lately, specifically turning classic things (sangria, snickerdoodle cookies, etc.) into cupcakes, and this is one recipe that I'm actually using for my final project in one of my classes. Here's my take on the classic ice cream Drumstick, in cupcake form.
The Lineup:
Vanilla cake batter of your choice
Vanilla frosting of your choice
1 cup semi-sweet chocolate chips
1 cup heavy whipping cream
Roasted peanuts for topping, chopped
Waffle or sugar cones for topping, broken into large pieces
The Play-by-Play:
1. Pour prepared cake batter into lined cupcake tins, bake according to cake batter
recipe.
2. When cupcakes are cool, pipe prepared vanilla frosting on top, with desired tip on
piping bag.
3. Pour chocolate chips and heavy cream into microwave-safe bowl. Microwave for 1
minute and stir until combined, reheating in 10 second intervals if necessary.
4. Generously drizzle ganache onto frosted cupcakes, mostly covering frosting.
5. Sprinkle chopped peanuts onto ganache and place cone pieces in before it sets.
Enjoy!
Quick Play:
This is my own adaptation, and I never really focus on the basics for things like this. Feel free to use whatever cake batter and frosting you want, and don't be afraid to change up the flavors. Also play around with the size of the cupcakes. When I made the trial batch of the recipe, I did standard size cupcakes, but for my class, I will be doing mini cupcakes. Really anything goes with this one.
I wish you all the best,
Erin
Hello friends! This is the first of the recipe series I'll be doing here, aptly named "Sweet Spot." Our first endeavor is scones. I'll be giving the basic recipe (I can't take credit here, it's a great Pinterest recipe I found and will link somewhere in this post), some photos during the process, as well as what I put in these delightful little treats.
The Lineup:
1 cup sour cream
1 tsp. baking soda
4 cups flour
1 cup granulated sugar
2 tsp. baking powder
1 tsp. salt
1 cup (2 sticks) cold butter, cut into small cubes
1 egg
2 tsp. vanilla extract (optional)
1 cup mix-ins
The Play-by-Play:
1. Preheat your oven to 350 degrees Fahrenheit and line baking sheets with parchment
paper.
2. In a small bowl, combine sour cream and baking soda. Set aside.
3. In a large bowl, whisk together flour, sugar, baking powder, and salt.
4. Incorporate cold, cubed butter into flour mixture using pastry cutter (or 2 knives)
until the butter is broken down into pea-sized pieces in the flour.
5. Beat the egg and vanilla into the sour cream mixture.
6. Mix the sour cream mixture into the flour mixture (you may want to use your
hands). Add milk if the dough is dry, but you don't want it be too liquidy. Mine came
out to be moist and slightly tacky, but still held its shape.
7. Add desired mix-ins, folding gently with hands.
8. Divide dough into 3 circles, cutting each circle into 6 triangles (I do 8 triangles, as I
tend to be heavy-handed with my knife).
9. Bake for 15-20 minutes or until golden brown on top and bottom. Be careful- they
go from golden to burnt very quickly!
10. Serve and enjoy!
Alternates:
- Blueberries
- Dried cherries, cranberries, or raisins
- Chocolate chips
- Canned pumpkin (start with 1/2 cup and add as desired) and pumpkin pie spice (1/2 tsp.)
- White chocolate chips and cranberries
- Orange or lemon zest
- Pumpkin pie spice (1/2 tsp.) and walnuts or pecans (I used this in half my batter)
- Cranberries and orange zest
- Dried cherries, pistachios, and almond extract (1/2 tsp.) (I used this in the other half of my batter)
Quick Play: This recipe halves beautifully, but keep the egg at 1 whole egg- makes the scones extra fluffy! (Perhaps try 2 in a whole batch...?)
Pro Tip: I also tried freezing the batter after I cut it into triangles (the pictures on the pans are what they looked like pre-freeze, so if you're going straight to baking you'll want to spread them out more.)
The Playmaker: http://www.thekitchenmagpie.com/the-best-scones-ever/
I wish you all the best,
Erin